Pipboy - Almost finished
I've been rather overwealmed with the positive responce to the Necrons - thanks everyone. The army is very close to being finished but after 2 weeks of non-stop painting, I need a break. In the meantime I give you the finished infantry. All infantry stands and Obelisks are mounted on a 1" steel washer and Monoliths and Pylons are mounted on a 1.5" washer.
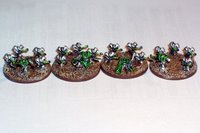
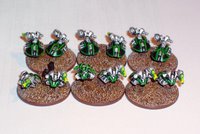
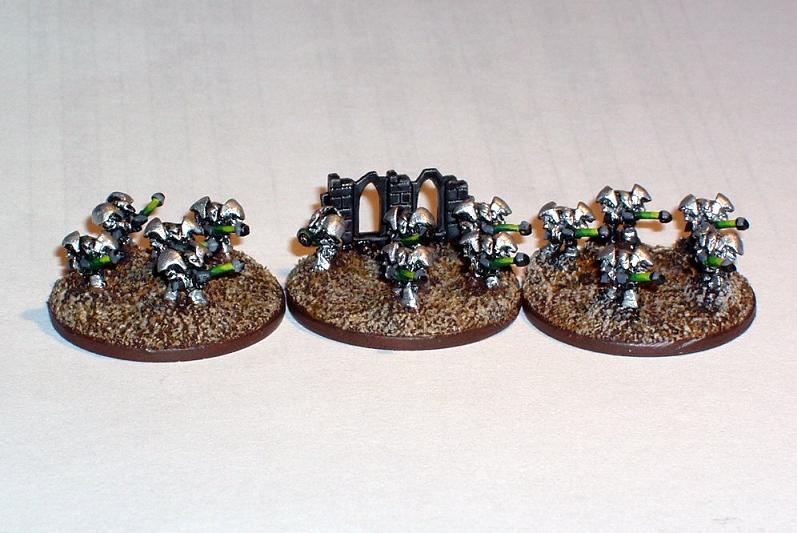
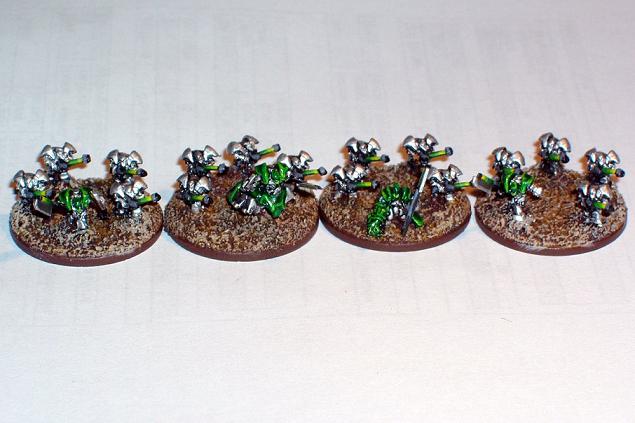
A selection of basic Necron Warriors:

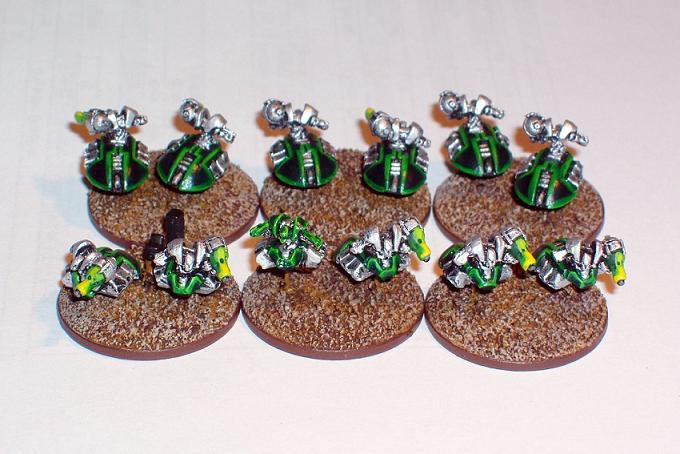
A couple of shots of the 4 Necron Lords:
The Destroyer Lord is my favorite.
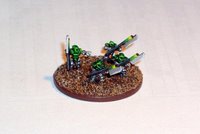
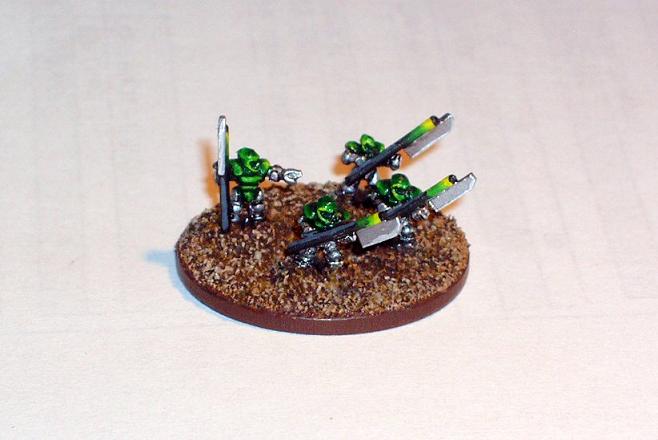
The 4 stands of Pariahs were converted from the DRM Andrayadas Scouts. I chopped off their rifles and added a glaive made of paperclip wire and plasticard blade.

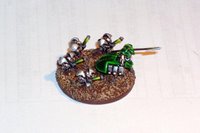
The Heavy Destroyers used 40k scarabs for the body and Andrayadas Heavy Weapon Trooper for the torso.
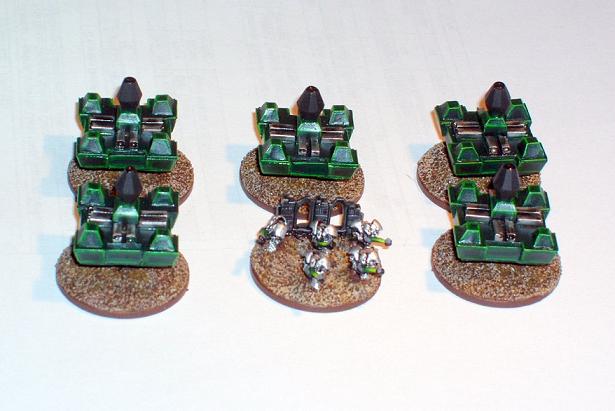
The Obelisks are scratch-built starting with a 20mm square base. I slapped a flat deck on top and built the 'central column' and 'corner stones' out of square plastic stock. The 'conduit' detail on the deck surface is just more square plastic stock. A bead from the craft store completes the model. Obviously these ones aren't fully painted yet. The only thing left is to paint the crystal a suitably glowing green.

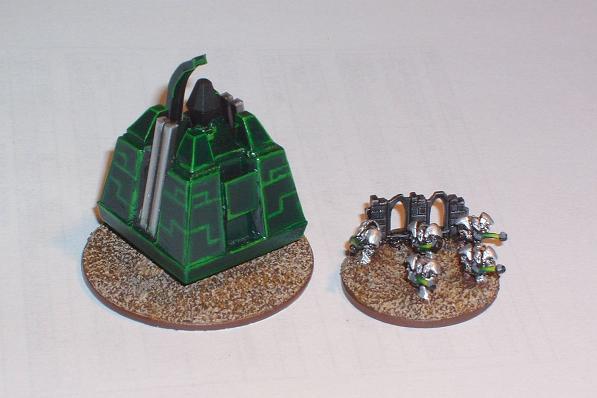
The Monoliths took a lot more work (and patience). I began with a 20mm square base for the top and a 25mm square base at the bottom. I then carefully cut notches in the sides of each base and glued 'U'-shaped plastic stock into the notches, thereby joining the top and bottom in a vaguely pyramid shape. I then cut plasticard plates and glued them to the sides to cover the open corners of the model. (It occurs to me now that I really should have taken progress photos of all this...) The 'corner stones' were made from the same square stock as the Obelisks, only taller. A 40k gauss flayer muzzle was used for the crystal cradle. Once that was all done I cast the Monolith (and the Obelisk and Pylon) with RTV rubber to make a mould. I used Alumilite casting plasic to produce a handful of copies. Finally I added the fiddly details like the vertical buttresses (more square stock), the rear detail, the top 'arm' (hand bent 'H'-beam stock), the portal door, and the crystal. Voila! It's pretty big for an AV but it is suitably impressive on the table. Again this Momolith is not yet finished the painting stage. I still have to paint the portal, crystal and icons.

Finally the Pylon gave me the biggest headache but the best result (I think). I used an old 40k Tarantula base for the legs and scratch-built the rest. The whole thing is built from plastic stock of various shapes ('H'-beam, square, flat, round, and quarter-round). The tricky part was to shape the crescent. I built the basic shape of the curve first, then immersed it into boiling water for a few seconds. The heat allows you to bend it around a shape/form. Hold it in place until it cools and retains its shape. It took 4 tries to get it right. After all that effort it was still a battle to get a descent cast of it due to all the fine projections. In the end it came together and now it's my favorite model of the army (for now).

A selection of basic Necron Warriors:
A couple of shots of the 4 Necron Lords:
The Destroyer Lord is my favorite.

The 4 stands of Pariahs were converted from the DRM Andrayadas Scouts. I chopped off their rifles and added a glaive made of paperclip wire and plasticard blade.

The Heavy Destroyers used 40k scarabs for the body and Andrayadas Heavy Weapon Trooper for the torso.
The Obelisks are scratch-built starting with a 20mm square base. I slapped a flat deck on top and built the 'central column' and 'corner stones' out of square plastic stock. The 'conduit' detail on the deck surface is just more square plastic stock. A bead from the craft store completes the model. Obviously these ones aren't fully painted yet. The only thing left is to paint the crystal a suitably glowing green.
The Monoliths took a lot more work (and patience). I began with a 20mm square base for the top and a 25mm square base at the bottom. I then carefully cut notches in the sides of each base and glued 'U'-shaped plastic stock into the notches, thereby joining the top and bottom in a vaguely pyramid shape. I then cut plasticard plates and glued them to the sides to cover the open corners of the model. (It occurs to me now that I really should have taken progress photos of all this...) The 'corner stones' were made from the same square stock as the Obelisks, only taller. A 40k gauss flayer muzzle was used for the crystal cradle. Once that was all done I cast the Monolith (and the Obelisk and Pylon) with RTV rubber to make a mould. I used Alumilite casting plasic to produce a handful of copies. Finally I added the fiddly details like the vertical buttresses (more square stock), the rear detail, the top 'arm' (hand bent 'H'-beam stock), the portal door, and the crystal. Voila! It's pretty big for an AV but it is suitably impressive on the table. Again this Momolith is not yet finished the painting stage. I still have to paint the portal, crystal and icons.
Finally the Pylon gave me the biggest headache but the best result (I think). I used an old 40k Tarantula base for the legs and scratch-built the rest. The whole thing is built from plastic stock of various shapes ('H'-beam, square, flat, round, and quarter-round). The tricky part was to shape the crescent. I built the basic shape of the curve first, then immersed it into boiling water for a few seconds. The heat allows you to bend it around a shape/form. Hold it in place until it cools and retains its shape. It took 4 tries to get it right. After all that effort it was still a battle to get a descent cast of it due to all the fine projections. In the end it came together and now it's my favorite model of the army (for now).

posted by Kevin at 7/11/2006 01:39:00 a.m.
![]()

3 Comments:
Whys is youz Flayed Onez covered inna green? Is dat where my Boyz all went ta? Oi! Mebee a WAAGGHH will larn ya sum manners!
Hi Pipboy,
I love your work.
I wrote about it on my blog and linked to you.
http://6mm-minis.blogspot.com/
I'd love it if you linked back to me.
Shalom,
Maksim-Smelchak.
Hi Pipboy,
Love your work!
Thanks for sharing!
Shalom,
Maksim-Smelchak.
Post a Comment
<< Home